
Meta description: Signed up for Hostinger Reach but not sure what to do next? Walk through every onboarding step, from connecting your domain to sending your first email campaign.
Most people sign up for an email marketing tool and then stare at the screen wondering what to do next. Hostinger Reach handles this differently.
Rather than leaving you to figure things out alone, the onboarding walks you through setting up your sender identity, audience, branding, and first campaign.
Reach is an AI-powered platform for creating and sending branded campaigns, and it's built for small business owners, solopreneurs, and beginners who want results without a steep learning curve.
This walkthrough adds the context around each step so you can move through the setup with confidence.
What happens right after you purchase or claim Reach
Once you've grabbed a Reach plan, the first thing you'll see is a panel to connect your domain.
After that, guided prompts appear as you move through the dashboard, walking you through adding contacts, setting up your brand, and creating your first campaign.
Each step builds on the last, so following them in order keeps things smooth.
If you're on the free plan, you get a year of access with 200 emails per month and 100 unique recipients per month. That's enough to test the email marketing tool, build a small audience, and figure out what resonates before committing to a paid tier, which starts at $2.49/month.
The free plan can only be claimed once, though, so don't let it sit unused.
Connect your domain
Connecting a domain builds trust with email providers, strengthens your sender identity, and improves deliverability.
If your domain is with Hostinger, a one-click connection automatically configures SPF, DKIM, and DMARC records. No DNS editing, no guesswork.
For external domains, you'll need to add DNS records manually and verify ownership. DNS propagation can take up to 24 hours, so give it time before reaching out to support.

Don't send any campaigns until domain verification is complete. Reach currently supports one connected domain at a time, so choose the one you'll be sending from.
Want to learn more about Hostinger Horizons?
Our review covers everything you need to know.
Access the Reach dashboard
There are two ways in: open hPanel and click the Reach tab on the left sidebar, or go directly to {{deeplink:198683:[https://reach.hostinger.com]:reach}}. You'll need a Hostinger account either way.
Once you're inside, look for the setup prompts. If there are any remaining onboarding steps you haven't completed, the dashboard will surface them so you can pick up where you left off.
Following these in order is the easiest way to make sure everything is properly configured before you send anything.
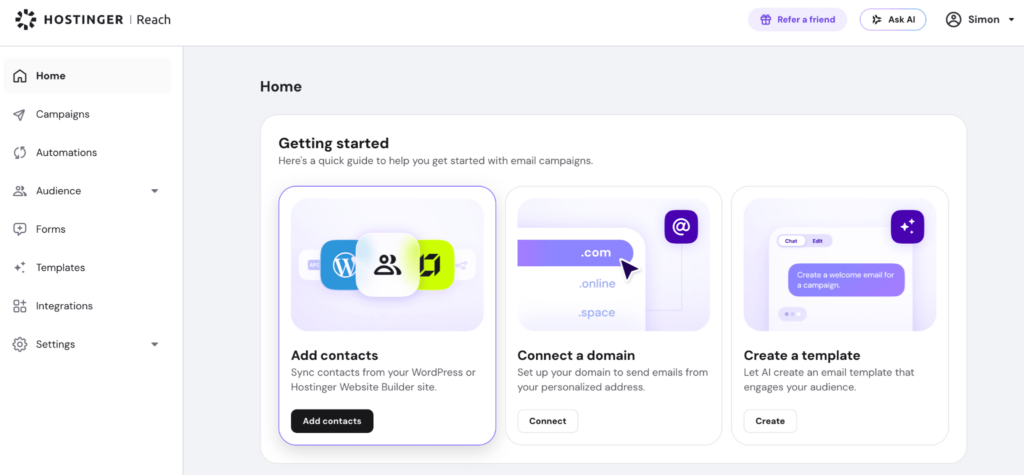
Check your plan limits before you start building campaigns. The dashboard shows how many emails and unique recipients you have available for the month. There's nothing worse than putting a whole campaign together and discovering you're 30 recipients over your limit.
Set up your business profile and brand details
Your business profile covers the practical side: business name, address, and contact details. This information goes into your email footers, and it's required for email marketing compliance.
Your brand details are where you upload your logo and choose your brand colors and style preferences. {{deeplink:198683:[Brand colors]:brand_colors_blog}} shape how people perceive your business, and Reach actually puts them to work.

Instead of handing you a blank template and wishing you luck, Reach uses your brand inputs to generate emails that look like they came from your business, not from a generic template library.
No design skills needed. Provide the basics, and every template you create going forward will reflect them.
One thing people overlook here: use a sender email with an active mailbox. If a subscriber replies to your campaign and it bounces, that's a missed connection and a bad look.
Add your contacts
You can get contacts into Reach a few different ways.
If you're using Hostinger Website Builder, WordPress, or the Public API, auto-sync pulls contacts in automatically.

Manual entry works for adding people one at a time or in small batches while CSV import handles existing lists you've built elsewhere.

And Reach Form Builder lets you create a contact form to embed on your website or share as a direct link.

Reach can store more contacts than your plan allows you to email, so your full list is safe even if your sending limits are lower.
Here's the thing people underestimate: list quality matters more than list size, especially early on. Only add contacts who gave clear consent to receive marketing emails.
Permission-based lists protect your deliverability, reduce unsubscribes, and keep you compliant with regulations.
If you're still growing your audience, putting effort into a strong {{deeplink:198683:[lead generation]:lead_generation_blog}} process now saves you from scrubbing a messy, unengaged list six months from now.
Create your first email template with AI
This is the feature that makes Reach feel different from most email marketing tools. Instead of staring at a blank canvas or scrolling through generic templates, you describe what you want to send and Reach generates a ready-to-edit email template.
Some example prompts to try:
- "Write a welcome email for new subscribers to my plant shop that mentions our care guide freebie"
- "Announce a 20% off spring sale for my handmade jewelry store, running from March 1st to 15th"
- "Create a monthly newsletter for my online photography course that highlights two new lessons and a student spotlight"
The more detail you give, like specific dates, offers, or the tone you're going for, the less editing you'll need to do afterward.
Your brand settings are applied automatically, so colors, logo, and style stay consistent. After you {{deeplink:198683:[generate an email template]:ai_email_generator}}, you can edit the copy, rearrange sections, swap images, adjust buttons, and tweak the layout until it feels right.

Create and send your first campaign
Setting up a campaign starts with giving it a name and {{deeplink:198683:[writing a subject line]:subject_line}}. From there, you select the email template you built, choose your recipients, and decide whether to send immediately or schedule it for later.
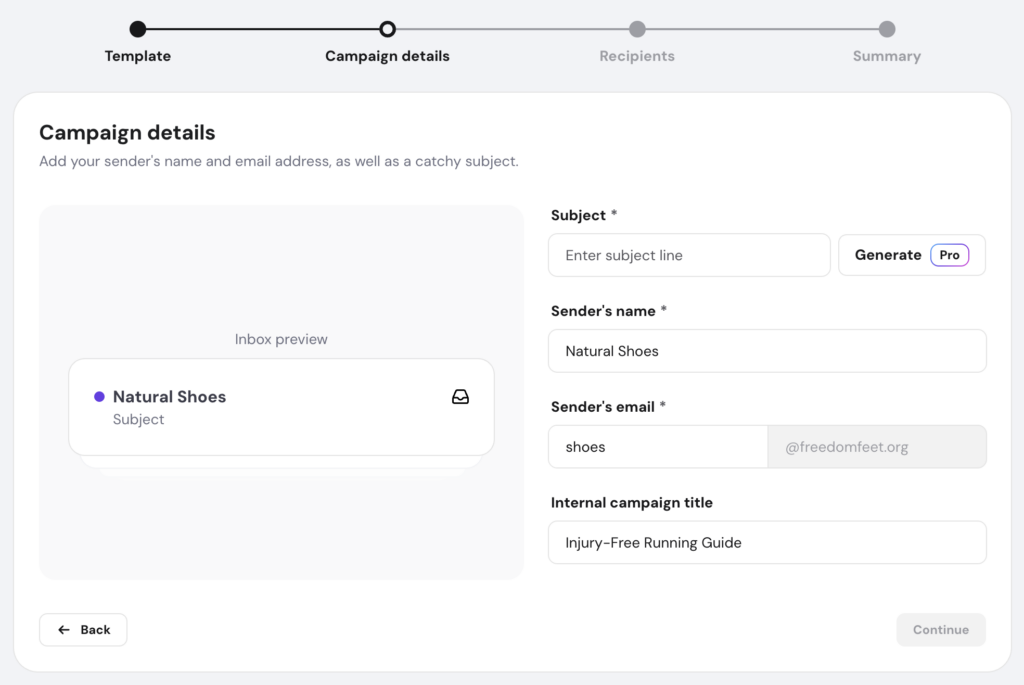
You can send to all your contacts, a specific segment, or multiple segments at once. If segments overlap, Reach automatically removes duplicates so nobody gets the same email twice.
Even with a small list, email marketing segmentation can noticeably improve open and click rates because you're matching messages to the people who actually care about them.
Before you send, go through this checklist:
- Send a test email to yourself.
- Click every link and button to make sure they work.
- Review your sender name and subject line.
- Confirm your domain is connected and verified.
Two minutes of checking saves you from sending a broken email to everyone on your list. And once it's sent, you can't unsend it.
What to explore after onboarding
Once your domain, contacts, branding, and first campaign are in place, you've got a solid foundation. These features help you build on it:
- Automations: Welcome emails, drip campaigns, abandoned cart emails, and post-purchase emails that send themselves. You set them up once and they run in the background. {{deeplink:198683:[Email marketing automations]:email_marketing_automation}} are a paid plan feature.
- Audience segmentation: Filter contacts by engagement level, source, tags, or subscription status. More targeted emails consistently outperform bulk sends.
- Forms and contact collection: Embed forms on your site or share a direct link so your list grows consistently while you focus on building your business.
- Double opt-in: Subscribers confirm their email before being added. It helps to prevent fake signups and keeps your list full of people who actually want to hear from you.
- Analytics: Open rate, click rate, click-to-open rate, and unsubscribe rate. These four numbers tell you most of what you need to know about whether your emails are landing.
Should you upgrade your Reach subscription?
The free plan gives you a year of access, 200 emails per month, and 100 unique recipients per month. For testing your approach and building an initial audience, that covers a lot of ground.
Upgrading makes sense when your needs outgrow those limits. Maybe your list passes 100 unique recipients, you want to send more frequently, you need automations, or you want to remove the Reach watermark.
You can upgrade from the top-right corner of the Reach dashboard or through hPanel. Paid plans start at $2.49/month and come with more AI tools, automations, and better branding options.
A bigger plan means getting in front of more people who already want to hear from you, and for a growing business, a solid {{deeplink:198683:[AI email marketing tool]:ai_marketing_url}} is the kind of investment that tends to pay for itself.